| This article is within the scope of the Portal Project, a collaborative effort to improve articles related to Portal and Portal 2. See the project page for more details about the article status. |
| To illustrate the article add one or more relevant images or upload them from canonical / official sources. For more instructions visit Half-Life Wiki:Images. |
- "Gentlemen, I give you Panels - the planks of tomorrow! Fully configurable - infinitely variable! Safe! Aperture-brand Panels will assist your Test Subjects every step of the way!"
- ―Cave Johnson[src]
The Aperture Science Panel is a dynamic structure and testing element in Portal and Portal 2, forming all departments and Test Chambers of the Aperture Science Enrichment Center.
In Portal 2, it often functions as the successor to the Victory Lift introduced in Portal, being able to form many structures, including stairs, when activated.
Overview[]
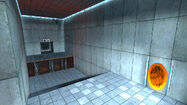
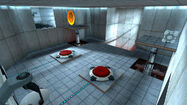
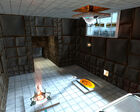
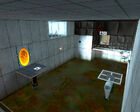
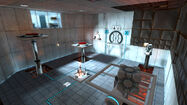
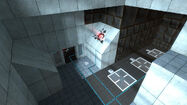
Panels form the walls and floors of test chambers, observation rooms, and offices in the Enrichment Center. They are generally either black or white tiled, indicating non-portalable and portalable surfaces respectively.
Portal[]
Whilst they are seemingly static, serving only as the bounds of a test chamber, they can also become dynamic, reconfigurable surfaces. Operated by hidden robotic arms or pistons, they can quickly form a new test chamber or adjust their configuration depending on player activity (for instance, the player can trap themselves in an area and a panel will open to allow them to escape).
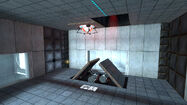
The panels were first seen to be major reconfigurable platforms in Test Chamber 14, where a floor would randomly rise itself to form a staircase for Chell.
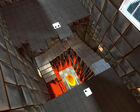
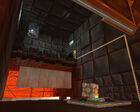
Eventually in Test Chamber 16, Chell discovers the backstage of a test chamber where she is first introduced to the murals by Doug Rattmann stating that "The Cake Is A Lie". The room revealed that the back frames of the panels were supported by pistons and that the pistons would need to be deployed by GLaDOS if she is to reconfigure these walls.
Many areas within the Escape chapter reveals more of a test chamber's exterior, where the back frames are in their position but often lacking a piston to be configured, while the other back frames are held.
Portal 2[]
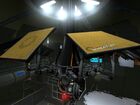
The panels play a much larger role in the sequel than it did in the first game. The panels are now supported by robotic arms, which were retconned into the game as a common variety and replacement of the pistons, which were still used within the cooperative campaign.
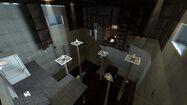
Unlike in Portal, the backstage of a test chamber contains robotic arms and holds the back frames of the walls and floors of the testing area, with the mechanics and structures of the test chambers revealed. For instance, when a panel moves around before Chell's eyes, or panels blocking her way moving into its position on a grid to allow the Test Subject to continue.
Many Multitasking Arms holding the panels appear to have a mind of their own, as they will juggle Weighted Storage Cubes, or slam against their frames out of frustration, even trying to get into their proper position by sliding back like snakes.
The reconfigurable features of the panels makes them the ideal as puzzle elements. They often act as the successor to elements in Portal, such as the Victory Lift and the Unstationary Scaffold, being able to move when activated to transport Test Subjects or act as further puzzle elements.
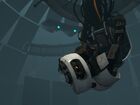
Apart from the departments, the Central AI Chamber has been upgraded and rebuilt entirely by GLaDOS herself, completely utilizing the panels to allow configurable access that she lacked in her chamber from Portal.
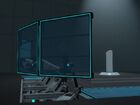
Within a Test Chamber, panels are accessible via the Core Input Receptacles, as Wheatley was seen moving wall panels apart at least twice, in which the second time was to help Chell escape Test Chamber 21 of the chapter, The Surprise.
Panels have been shown to be defective, and can be seen banging floors repeatedly in exterior levels.
Structure[]
Outside the test chambers the Aperture Science Multitasking Robot Arms move on rails to assemble the panels or couple with them to form the mobile structures such as the stairs. (This can be seen on test chamber 14), it's probable that the testing chamber moves to a docking port that contains these "panel racks", the panels themselves have no frame to acutally rest upon, instead, it's assumed that there's some docking mechanism inside them, this could also explain how some panels that form elevated floors only have 1 robot arm and the rest of them are attached to the panel.
The panels are mounted to each other or connected to the test chamber's beams, however the robotic arms can move in any way once they have been placed into their respective positions by a piston. The panels will then lift these tiles into place and can then remain stationary until they are needed again.
Behind the scenes[]
- The panels were formally introduced in the first of four informational videos leading up to Portal 2's release, narrated by Cave Johnson.[1]
- The panels in Portal were originally suspended from pistons and have been replaced in Portal 2, whereas in the abandoned test chambers in chapter 1, the victory lift and other panels are instead hydraulic pistons (or perhaps the Aperture )
- Although the cooperative campaign of Portal 2 often utilizes pistons as panel supports, the robotic panel arms were seen scattered around a ruined Test Chamber 19, attempting to arrange themselves back onto their grids. This suggests that most of Portal's test chambers were retconned to the robotic arms instead.
Gallery[]
Portal[]
Portal 2[]
Pre-release[]
Retail[]
List of appearances[]
- Portal (First appearance)
- Portal 2
- The Final Hours of Portal 2

